

Takeoff by hand
Scale and calibrate
Set each sheet's scale, check it against a printed dimension, calibrate from a known length, and confirm a scale crux set.
Every square foot is measured length × scale², so a wrong scale makes every number on the sheet wrong at once. Scale is set per sheet: a plan set is never one scale.
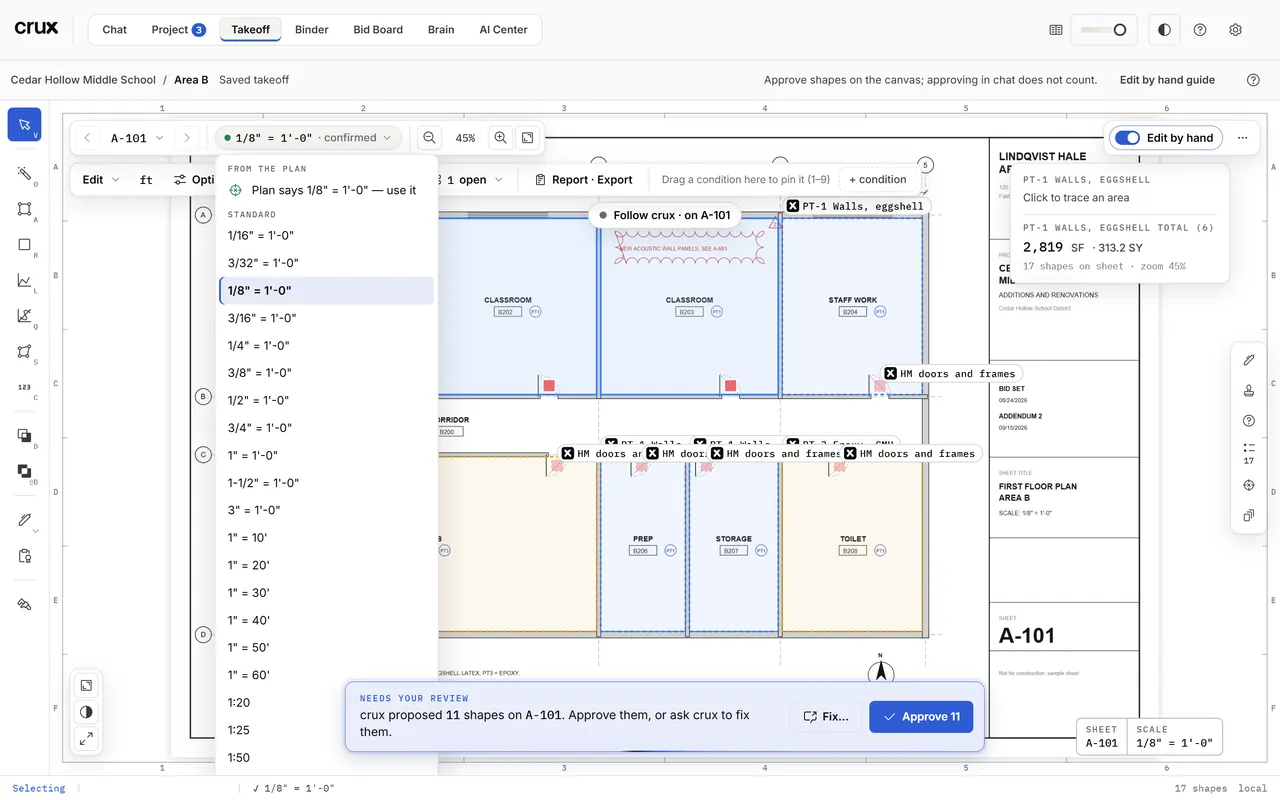
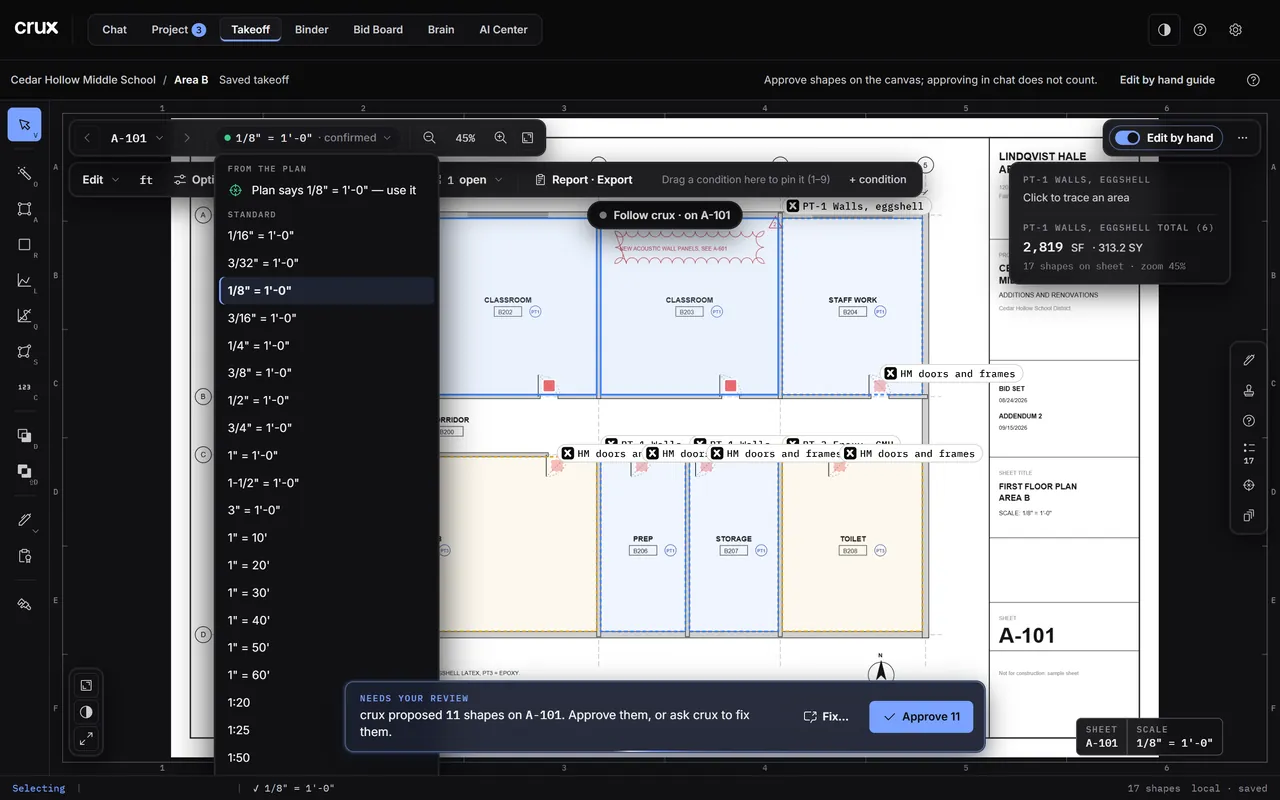
The scale chip
The chip in the top bar (2 in the layout) shows the sheet's scale and its state:
| Chip | Means |
|---|---|
1/8" = 1'-0" · confirmed (green dot) | Set and confirmed by a person. Ready to measure. |
· confirm or · check (amber) | crux set it from the drawing, or it disagrees with the scale printed on the sheet. Check it, then confirm. |
| Set scale (amber or red) | No scale yet. Every measuring tool except Count refuses. |
Click the chip for its menu:
- Confirm agent-set scale: when crux set the scale. Check a dimension first, then confirm.
- Revert scale (was …): right after a rescale, one step back.
- From the plan: Plan says 1/8" = 1'-0" — use it: the scale read from the title block. Hover it to see a ruler drawn at that scale on the sheet before you pick it. ± means the sheet shows several scales: check it.
- Standard: architectural (1/16" to 3" = 1'-0"), engineering (1" = 10' to 60') and metric (1:20 to 1:500).
- Calibrate two points… and Check a dimension… (K).
After you pick a scale, a ruler appears on the sheet for a few seconds with the caption "a door opening is about 3′". If it looks wildly off, the scale is wrong.
Check a dimension
key K. Read-only: it checks the scale before you trace. Make it a habit on every new sheet.
- Press K, then click both ends of a printed dimension, the longer the better.
- The prompt shows what that span measures at the current scale.
- Type what the drawing says:
12.5,12'6,12' 6"and6"all work. - Read the verdict: green matches (within 1%), amber off (within 5%: re-check), red wrong scale (past 5%).
- Recalibrate to this turns the check into the sheet's scale.
Calibrate
Calibrate (the last tile on the rail, or the scale menu). For a sheet with no usable printed scale.
- Click both ends of something the drawing dimensions: use the longest dimension you can find.
- Type its real length (feet; meters in metric) and click Apply (or Enter).
- Backspace removes a misplaced click; Reset starts over. Both clicks must be on the same sheet.
Your own scale pick, calibration or recalibration counts as confirming the sheet.
Rescaling a measured sheet
Change the scale after tracing and every shape on that sheet is re-measured at once (counts keep their EA). Revert scale in the menu takes it back one step. A rescale clears the undo list.
ft or m
ft / m in the tool row switches every number on screen, the report and the exports between feet and meters. Display only: the takeoff itself never changes.
Common mistakes
- Measuring before the scale is confirmed. An amber chip means crux set it and no person has checked it; the report marks that sheet's quantities as unconfirmed.
- Calibrating on a short dimension. A small click error on a 3' span is a big error on the sheet; use the longest dimension.
- A detail at another scale on the same sheet. The sheet's scale fits the plan, not the enlarged detail beside it: check the detail's dimension before you trust a trace there.
- Two clicks on different side-by-side sheets. Check and calibrate on one sheet.