

Takeoff by hand
Markups, stamps and RFIs
Notes on the drawing that are never measured, reusable stamps, RFIs raised from a markup, and your approval stamp.
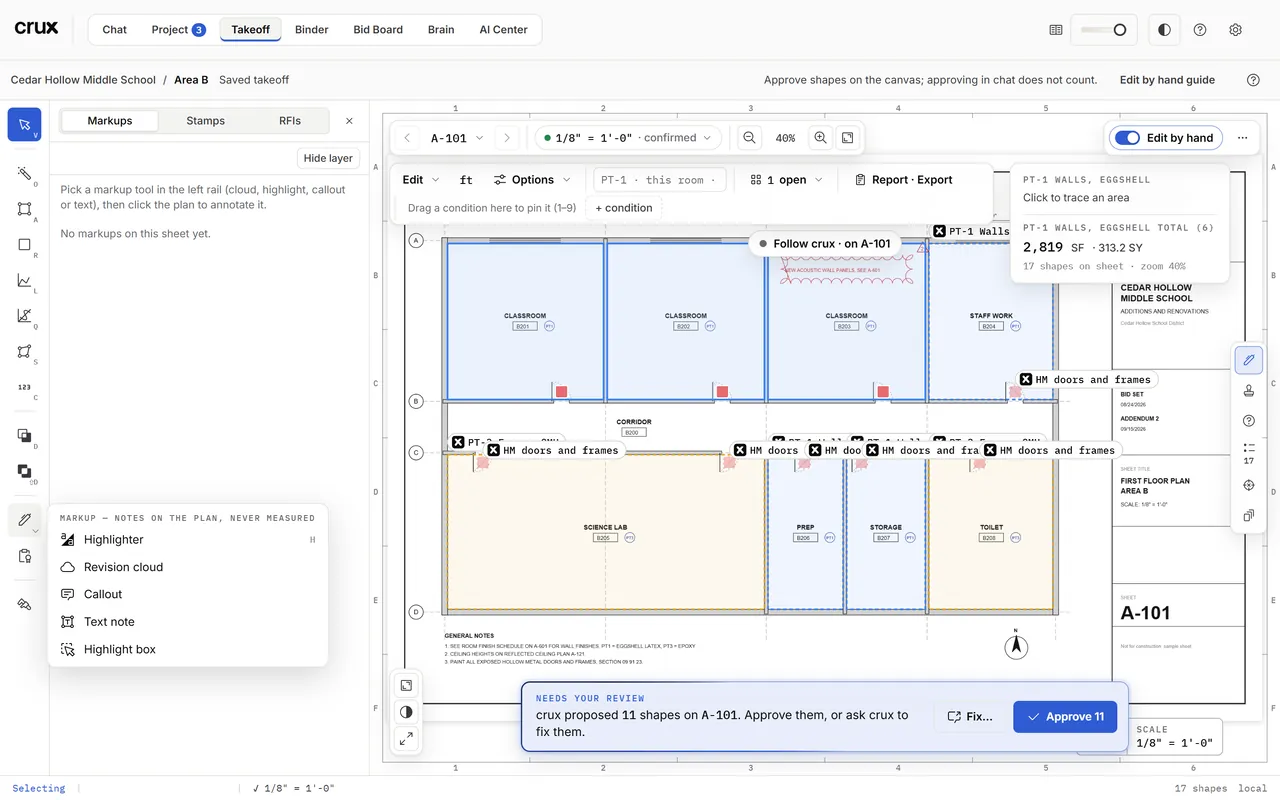
Markups are for talking, never for quantities: clouds, callouts, notes and highlighter ink sit on their own layer and no total ever counts them.
The markup tools
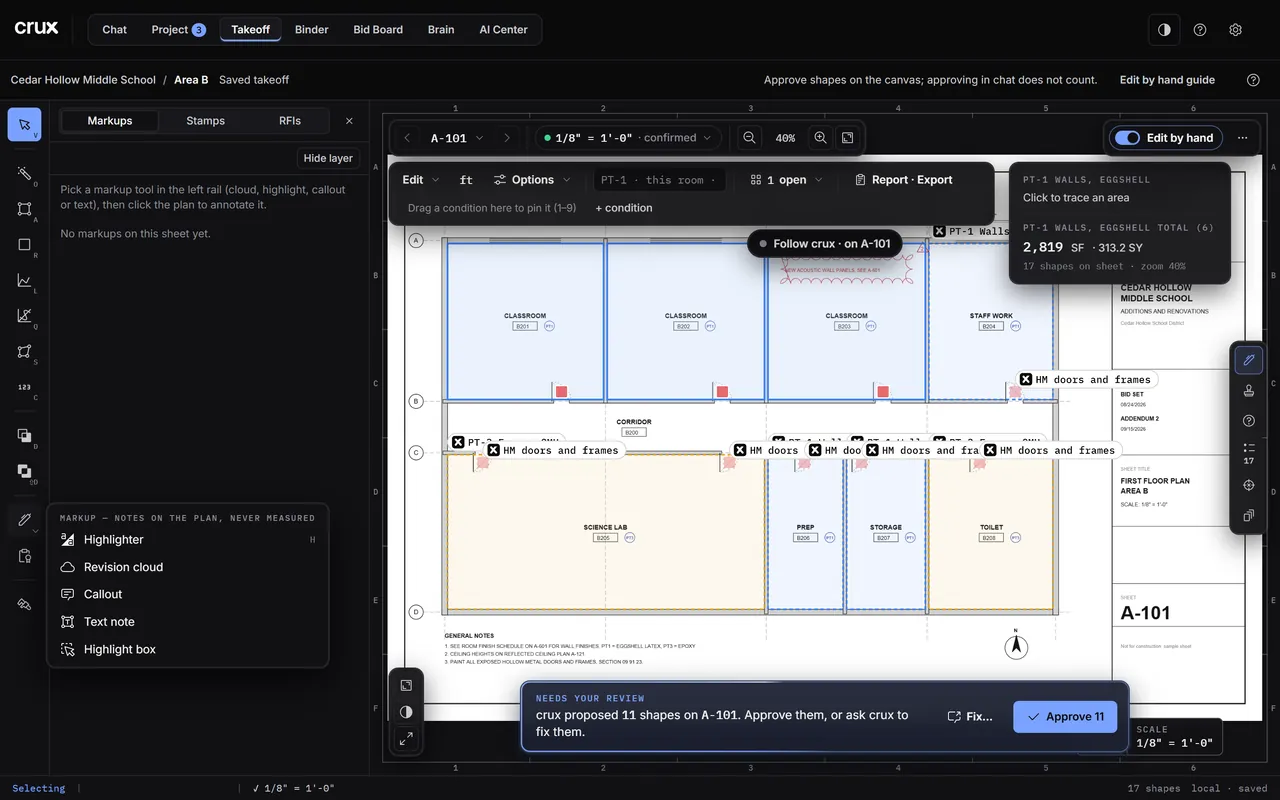
Click Markup in the rail's mark group and pick one:
| Tool | Key | How |
|---|---|---|
| Highlighter | H | Press and drag to paint, stroke after stroke. A small panel beside the rail picks the ink (five colours), the tip size (F, M, B) and a chisel or round tip. While it is armed, pan with Space-drag or the middle mouse button. |
| Revision cloud | none | Click two corners; the cloud lands, then type an optional note (Esc keeps the cloud without one). |
| Callout | none | First click the thing you point at, then where the label goes, then type. |
| Text note | none | Click, then type. Empty text is not kept. |
| Highlight box | none | Click two corners. |
To change one afterwards: with Select, click it to pick it, drag to move it, double-click to edit its text, Backspace to delete it.
The Markups panel
Markups in the panels on the right edge opens the left panel with three tabs: Markups, Stamps and RFIs. The Markups tab lists the markups on these sheets with their text, colour, line style and weight, and Hide layer / Show layer for the whole layer.
Stamps
A stamp is a saved group of markups you drop with a click: "VERIFY IN FIELD", a north arrow, your own note.
- Make one: select a markup, then Save selected markup as stamp, or Import an
.svgor a stamp-library.json. - Click Place on a stamp, then click the drawing: each click drops a copy until Esc.
- Export shares your stamp library.
Stamps are kept on this computer for every job.
RFIs
Turn a markup into a tracked question:
- In the Markups tab, on a cloud, callout or note, click Raise RFI (or Link existing… to add it to an open one).
- crux numbers it (
RFI-001) and opens the register with the subject from the markup's text. - Fill in the question, status (Open, Answered, Closed, Void), priority, ball in court, cost and schedule impact. Answered stamps the response date.
The register exports as CSV or JSON from the report, and the marked-set PDF shows the RFI number on the drawing plus an RFI schedule page.
Note: The job's real RFIs to the GC or architect live in the job's RFI Log in the Binder, drafted by crux with citations (see Questions and RFIs). The canvas register is for marking up the drawing.
The approval stamp
Approval stamp, the last tile in the rail's mark group. Your ink, and only a person can place it: no agent or tool can.
- Arm it (it turns green).
- Click a takeoff to approve it, or click empty drawing to approve the sheet at that spot.
- Click a seal to lift it. Ctrl+Z undoes a seal or a lift.
The estimator's seal is a green ring reading APPROVED; a mark crux makes is a grey diamond reading AGENT, so nobody mistakes one for the other. Seals print on the marked-set PDF, and its cover counts how many shapes a person approved.
Common mistakes
- Expecting a cloud to change a quantity. Markups are never measured. Use a measuring tool or a deduct.
- Panning with a drag while the highlighter is armed. That paints. Use Space-drag.
- Leaving the approval stamp armed. Every click on a takeoff approves it; press V to go back to Select.